The following tutorial is going to teach you how to remove background using magic wand tool.
On our several tutorials we have showed how to remove background from images with the help of clipping path service. Today we will help you to learn how to remove background suing magic wand tool.
Have you ever imagined removing background from an image with the help of magic wand tool? Yes, it is easy to replace the background of an image by magic wand tool. You may not have the knowledge on clipping path service to remove background from an image. But you can easily use the most easy tool magic wand tool to remove existing background. And this content is about to remove background using magic wand tool.
Magic wand tool: The graphic artists use different to produce fine images. There are many selection tools in Photoshop. But those have to be segregated in order to be used. The magic wand tool is so much helpful to select and specific part of an image. That selected part can be copied, edited and masked according to necessity. There is no need of clipping path service if the magic wand tool applies properly.
This exclusive feature allows us to select the different of images. And then we can edit those parts easily. Photoshop masking can easily be done with the help of this tool.
The following tutorial is going to show you how to use magic wand tool to select an image and replace the background.
Step1:
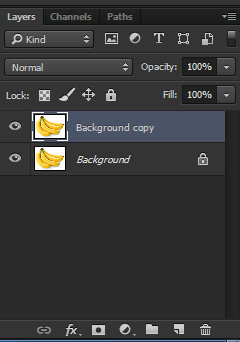
Open the image you want to edit in Photoshop. You should have the access of file menu option in Photoshop, and open your desired image for practice. Then create a duplicate layer from original one.
Step 2:
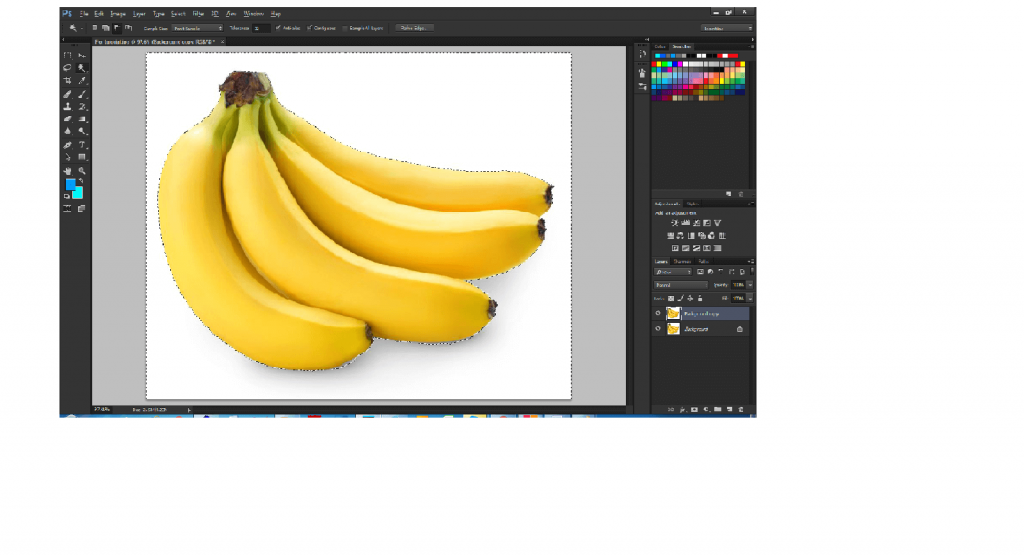
After opening the file in Photoshop you have the full access now. Then you have to select the “Magic Wand Tool (W)” from menu of tool box. You will get it from tools option of windows menu.

Step 3:
Now select the white area you want to remove. The tool will select all the white areas within the view.
Step 4:
Now you should have a duplicate outlay of the created image. The reason is it will help us to work on duplicate copy when preserving the original one. Now the original copy is hidden by switching off the visibility icon. You can easily do that by clicking on delete key.
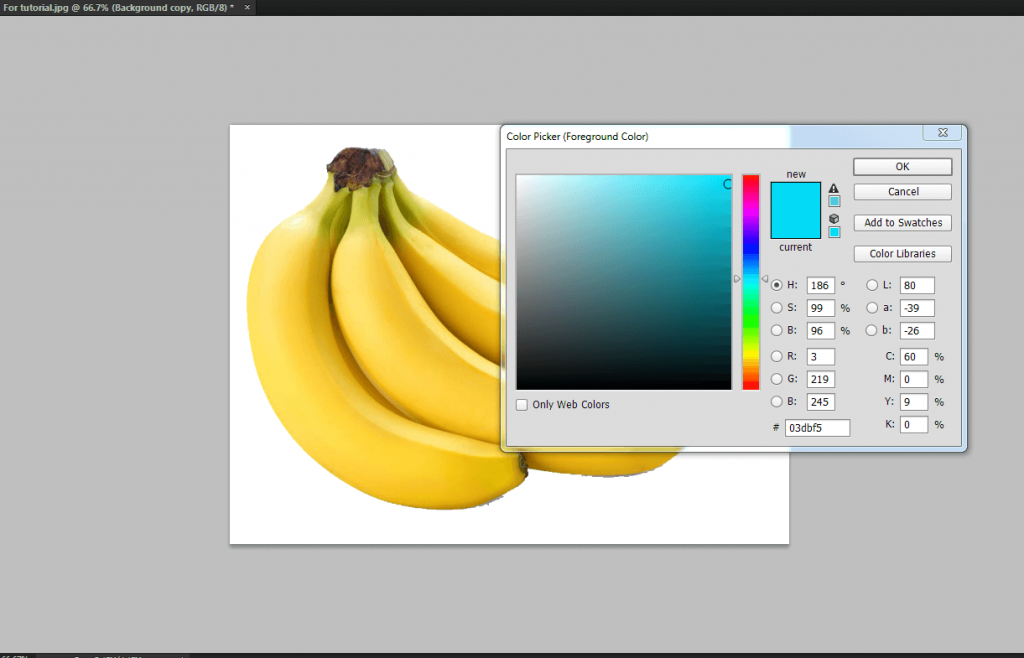
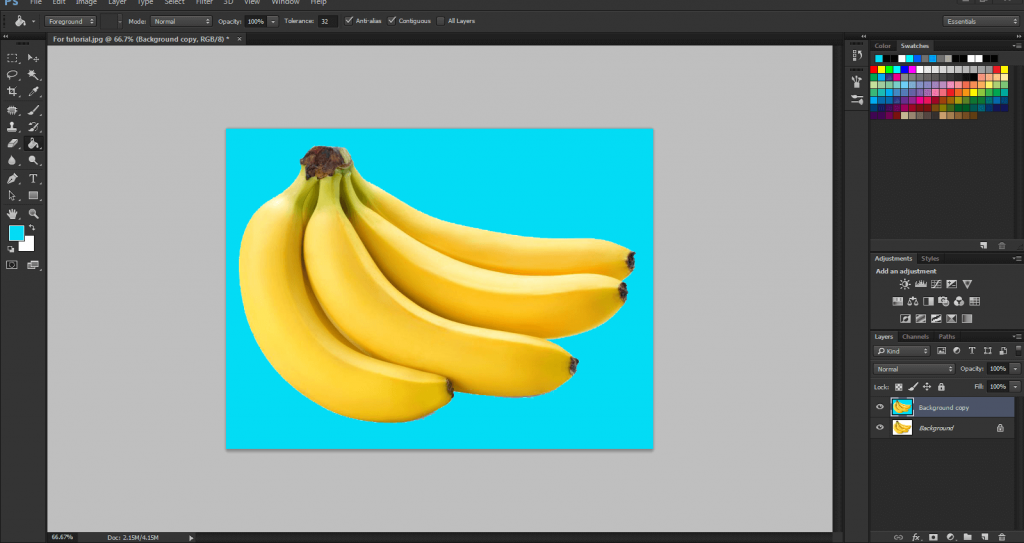
Then go to color option and select your preferred color.
Step 5
Now click on the paint bucket tool from tool bar. Then click on the image background and the background will be changed into your preferred color.

Step 6:
Just click ctrl+d to remove the selection. And now the image is placed on a new background.

See the final image after removing background;
So, isn’t it so easy to replace the background of an image into another background by magic wand tool? You can easily select an image and replace the background within 1 minute. It saves your time and money also if you can remove background using magic wand tool.
If you need any help regarding photo editing service or remove background, please let us know. We will be happy to help you.