This tutorial will show Skin Retouching Technique in Adobe Photoshop with frequency separation, the burn and the dodge tool.
We all love, clicking pictures and keeping them as memories that we can cherish for a lifetime. Clipping path service helps us to remove background from image and drop shadow service increases the natural beauty of images. These are fundamental technique to enhance an image. But sometimes, some pictures end up being bad and damaged due to lighting issues or makes someone look very funny or ugly. Will that mean that your moments and memories are wasted and can’t be used? Not anymore, as this tutorial will teach you skin retouching technique to retouch your photo and make it look amazing and you never lose the memories ever again!
You can easily create a natural look while maintaining a smooth, natural skin appearance and texture after removing background from an image by clipping path service.
The following steps of skin retouching technique will show how to retouch a portrait in Adobe Photoshop.
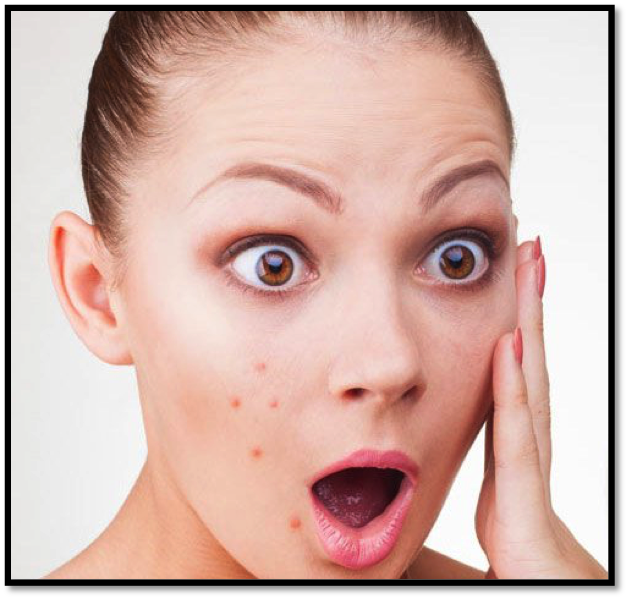
STEP 1: Open the image in Photoshop
The retouching will start with the frequency separation method. This is the very important point for photo retouching services.
STEP 2: Create 2 duplicate layers
Now we will create 2 duplicate layers by pressing Ctrl + J (Command + J).
Rename the first layer as “Color” and the second layer as “Texture”
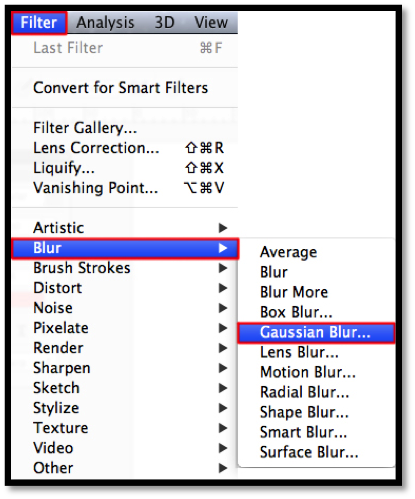
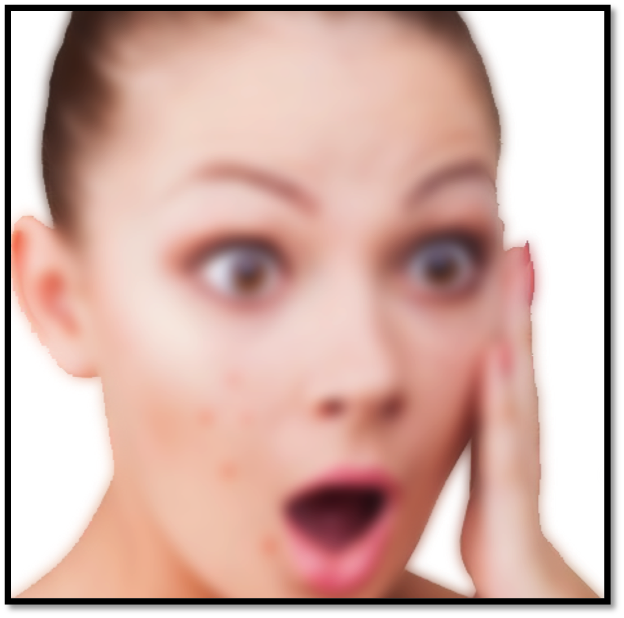
We will be isolating the color on one layer and the texture will be isolated in he another layer. First select the ‘Color’ later and Go to Filter – Blur – Gaussian Blur.
A pop-window will burn and you will have to increase the radius until you see the colors all mixing together making it blurred. In this, we can select 10-15 pixels.
STEP 3: Select texture layer
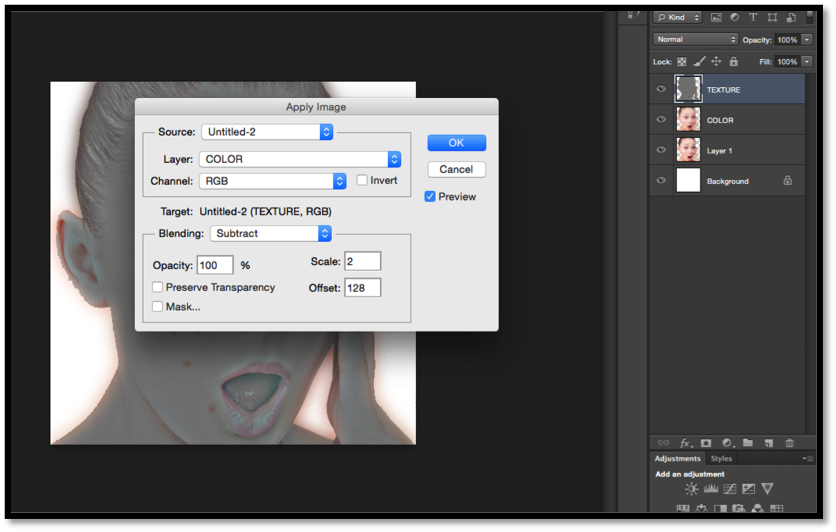
Now, go to the ‘Texture’ layer. Press on image menu and select apply image. In the Pop-up window, select ‘Color’ layer, Select ‘Subtract’ in the Blending mode.
Set the scale to 2-4 and the offset to 120-130.
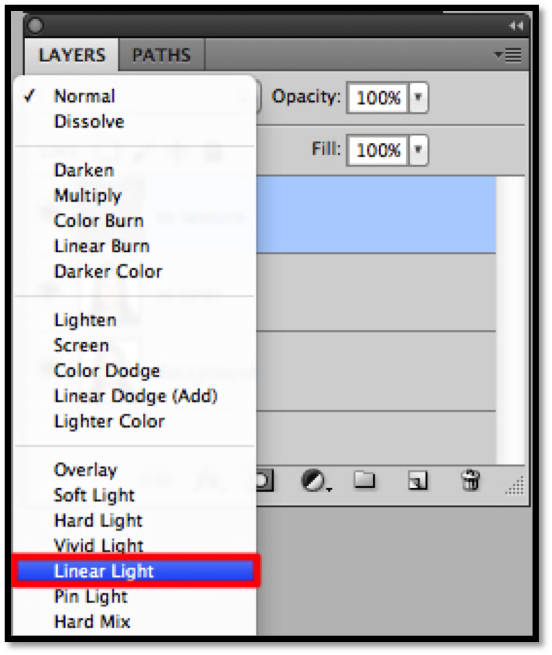
After that we go to layers tab and set the blending mode to ‘Linear Light’
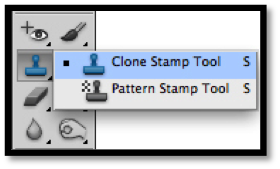
STEP 4: Select the clone stamp tool
Now we rectify the color problems in the image. There can be dark spots dark circles or uneven skin tone.
Select the ‘color’ layer. Select the Clone Stamp tool. The opacity and the flow can be set to 30-50%. Pick up the selection marquee tool and select the area you want to rectify the color of.
To pick up the color (which you need to use to cover the dark layer), click on that spot while holding onto the Alt key (Option key in Mac). This will pick up the spot which you will be using to color rectify your image.
Start cloning on the selected area. It can be helpful if you make an extra copy of the background layer to see the difference in the before and after image. Cloning can be used to retouch different parts of the face to remove lines, pigmentation, redness etc.
STEP 5: Apply the clone stamp tool
Now we will apply the clone stamp tool in the ‘texture’ layer to remove acne or spots. Select a clear area of the skin and then dragging them to the spots/acne of the skin. If there is any color correction still there, you can simply go back to the color layer to remove it.
Step 6: Applying dodge tool and burn tool to cover the skin retouching technique
Now that the retouching is over, we will make our portrait look even better using the dodge and the burn tools.
We need to make new layers for this. Rename one as ‘Dodge’ and the other as ‘Burn’. Select the layers and reduce the exposure of the layers to 50%.
Using the Dodge tool around the eye areas, under the brows. Consider the areas that a girl would use for makeup. Finish retouching all the areas that need to be brightened.
You can also apply some makeup on cheeks by this tool or by picking up a blush color, and using the paintbrush tool with 0 hardness to create a soft pink glow on the apple of her cheeks.
Now we will go to burn layer and use the burn tool.
We will use the burn tool to darken the eyebrows so that they look dark and clean. The burn tool can darken the outer corner of the eye as well. The burn tool can also be used to add definition to the cheekbones.
So, this is all about portrait retouching tutorial and we have tried our best to show it with the photo retouching software of adobe Photoshop. If you have any question of suggestion for image retouching technique, please let us know on the comment section.
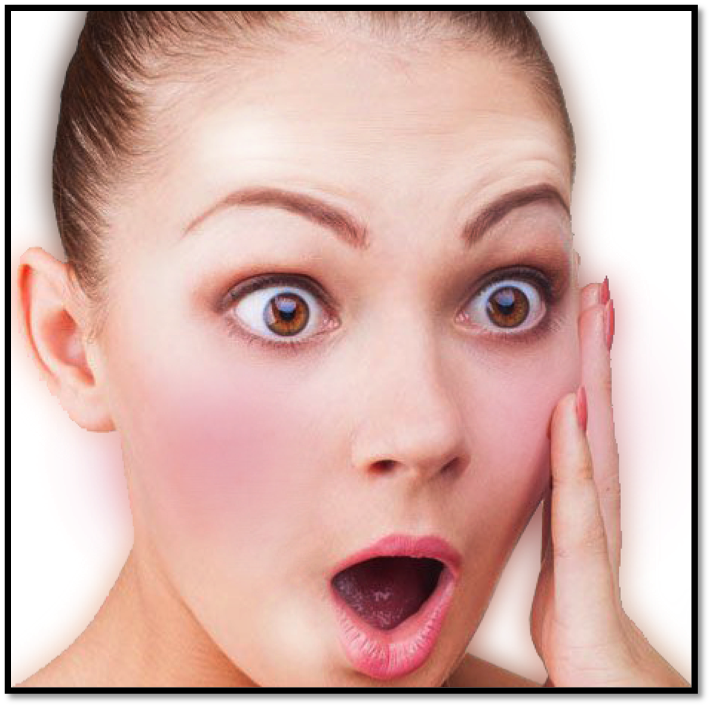
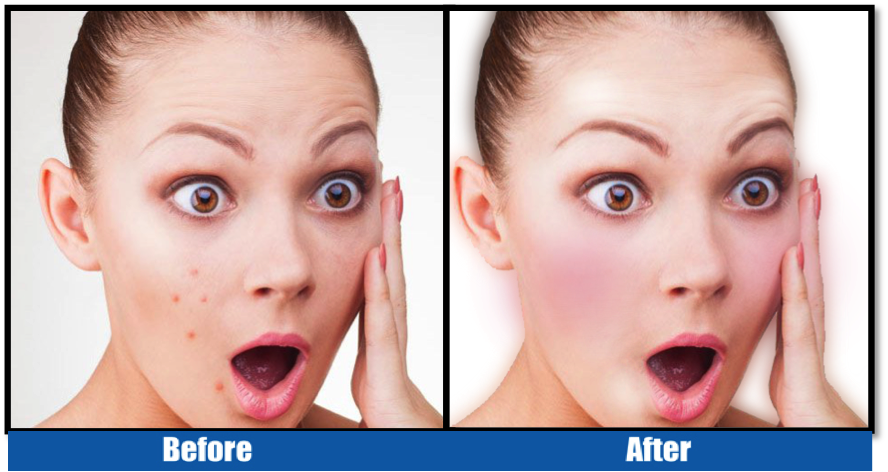
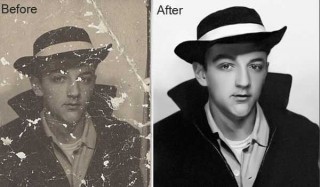
Your photo is perfect and ready to be used or posted online! Now, have a look at the below image for a before and after look.





Awesome tutorial indeed!
Thank you.
Facial Center is not simply a modelling device, instead
a comprehensive suite of devices designed to assist you attain much better facial animation in less time than before.
Thank you for advice. We will try to provide more helpful posts within short time.
Great posts