Swap faces in Photoshop with the help of photo manipulation service.
Welcome to another important tutorial.Last time we showed you how to remove background from images with the help of clipping path service. Now we are going to show you another technique of photo manipulation service.
This process is called photo manipulation service. Just follow the step by step procedure carefully. And promise you will be able to swap faces easily and quickly with the help of this tutorial. Photo editing service company provides this service by taking much cost. But if you practice this Photoshop tutorial, you can swap faces and save your money.
In this image manipulation service tutorial, we are going to show you how to easily swap faces in Photoshop. We are going to use the face of a woman.

And we will place her face on the face of this woman.

In this case the lasso tool will help us. You can select lasso tool from tool bar or you can just press L on the keyboard to select that tool.

With the help of lasso tool we will draw a selection around the woman’s face. Like this;
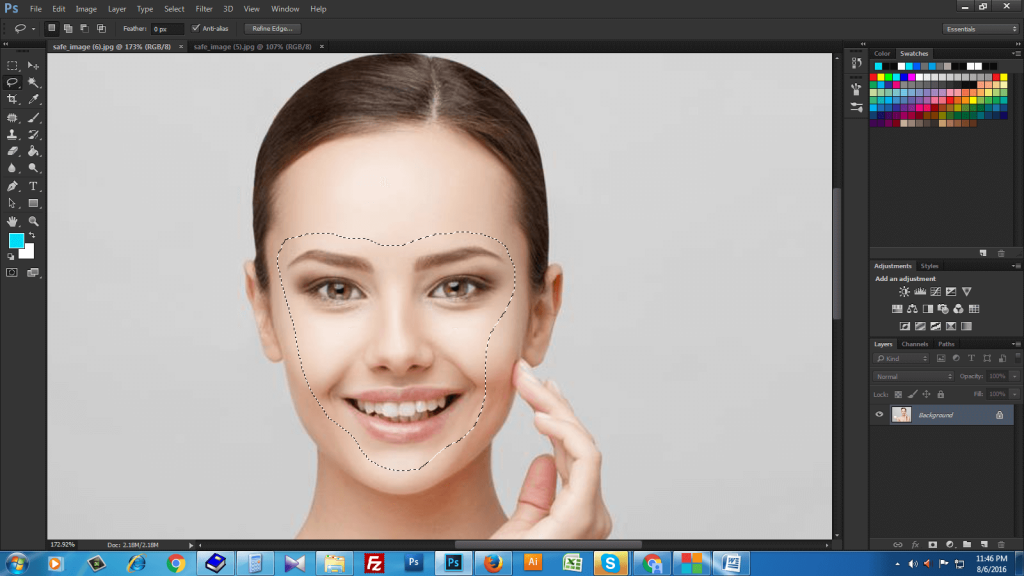
When you are drawing the face of woman, you should draw that carefully so that fit with the face of other woman. You should keep any crease that has on another woman’s face. If you missed any spot of the face, then hold shift and select those missed areas also.
So, the selection has been completed. Now we will press Ctrl C on keyboard to copy on the selection. Then we will go to the image of woman on that face we will place the selected face. Just press Ctrl V to paste the selected face.

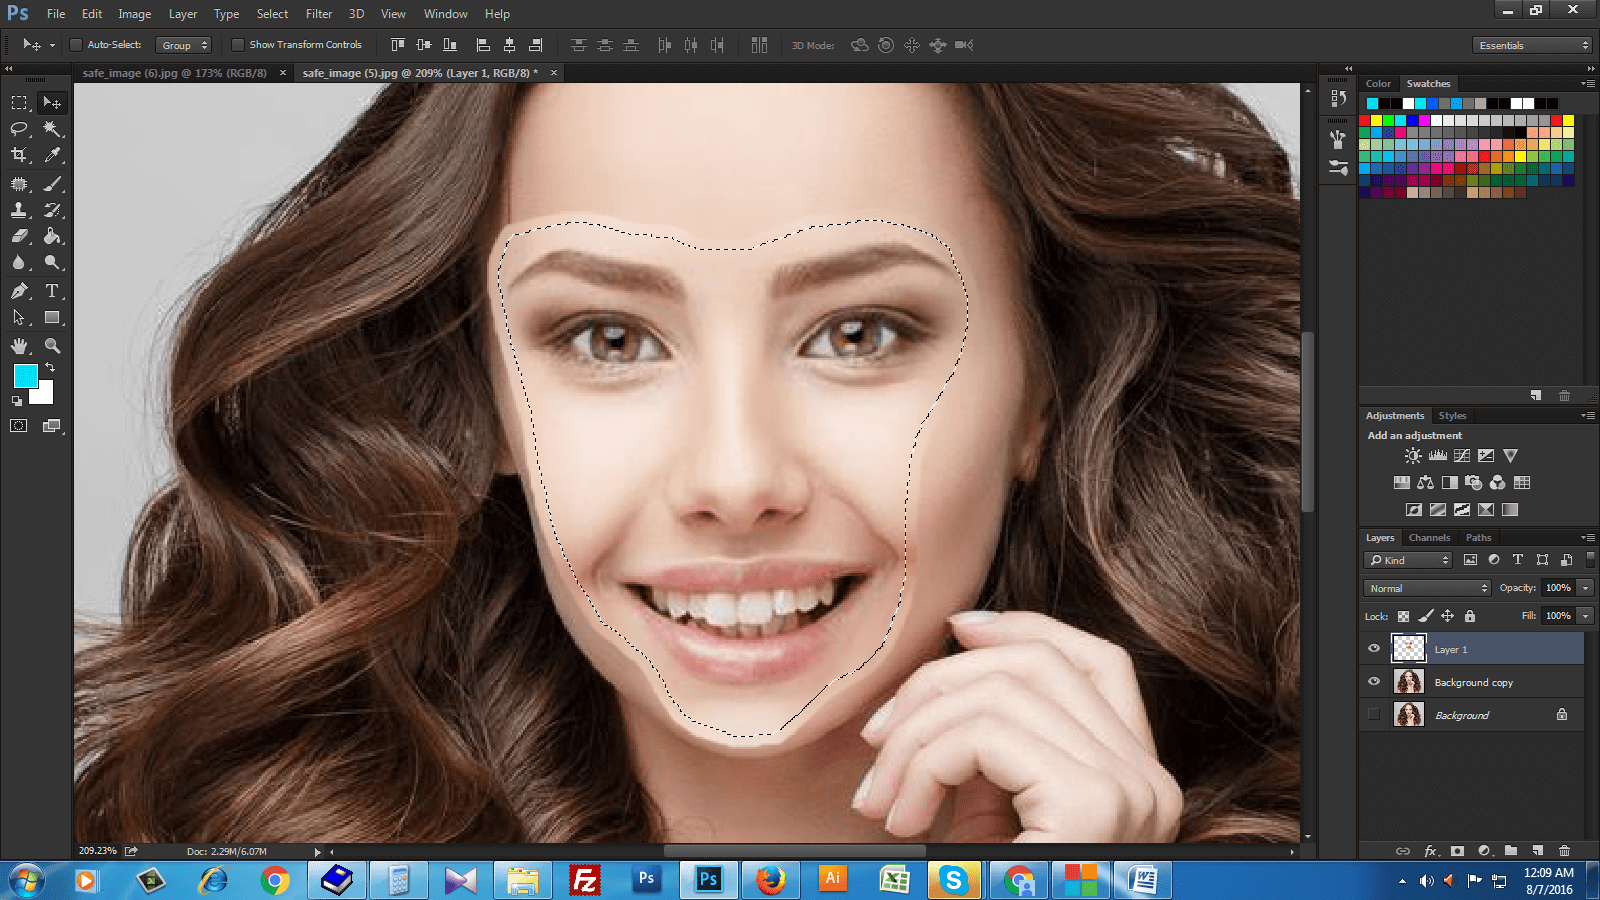
Then press Altr and use the mouse wheel to zoom in. The reason of zoom in is to see the perfect ratio of face. Now we will go to layers panel and set the opacity to 15%. This is the layer 1.

Now press V on the keyboard to select the move tool to move the selected face. Then we will press Ctrl T to transform the selected face. Here we will drag the face over the woman’s face and eyes. We will of course set the eyes of selected face over the eyes of woman face.
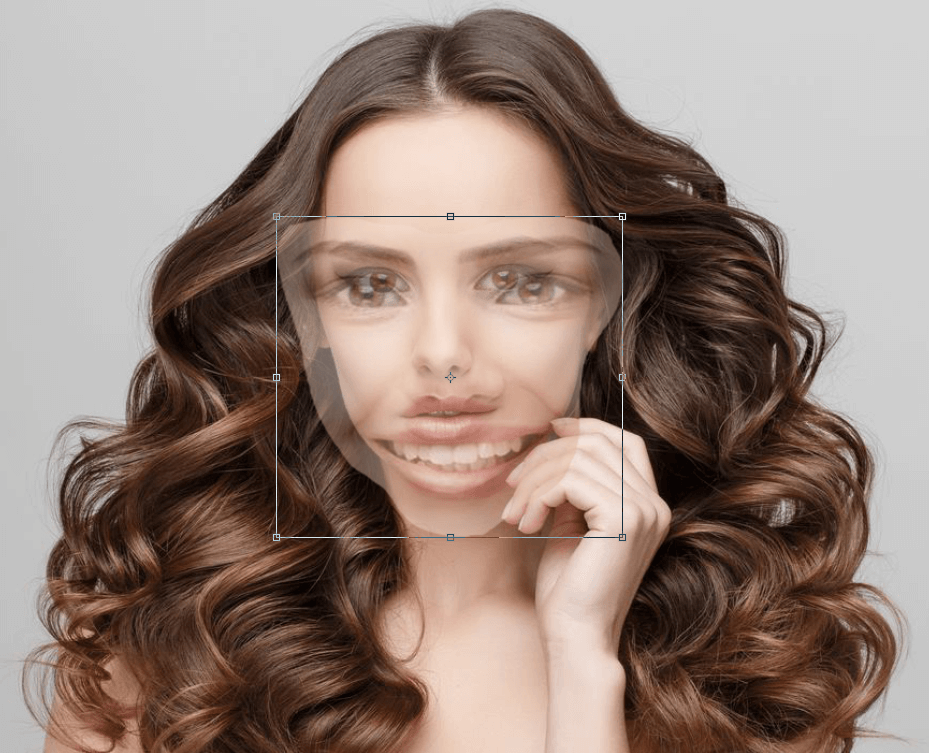
We will now set the face according to necessity to fit on the woman face. We will hold the corner of transform area and scale the face down or up to set perfectly.
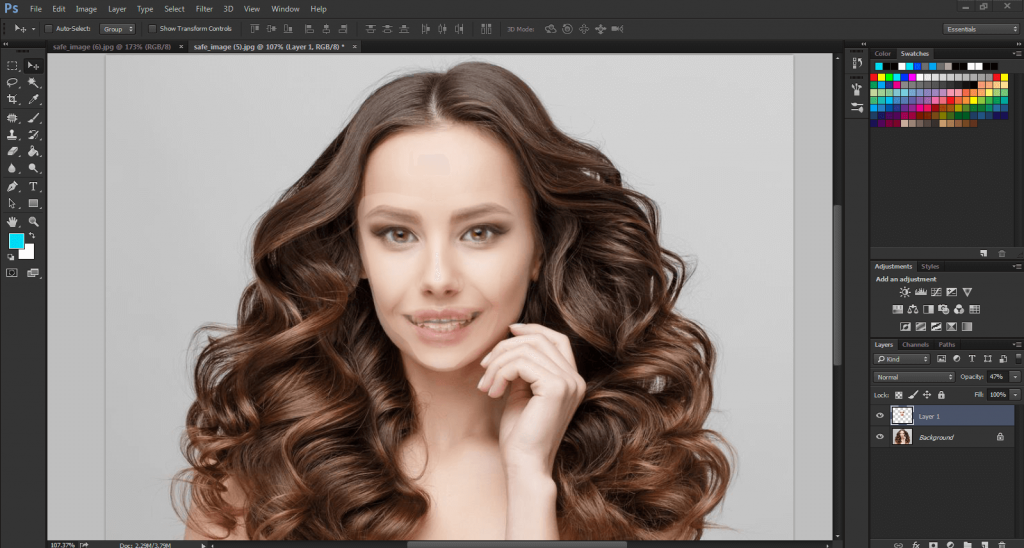
Now we have done it perfectly. Then we will press enter on keyboard go to the opacity to bring that 100%.
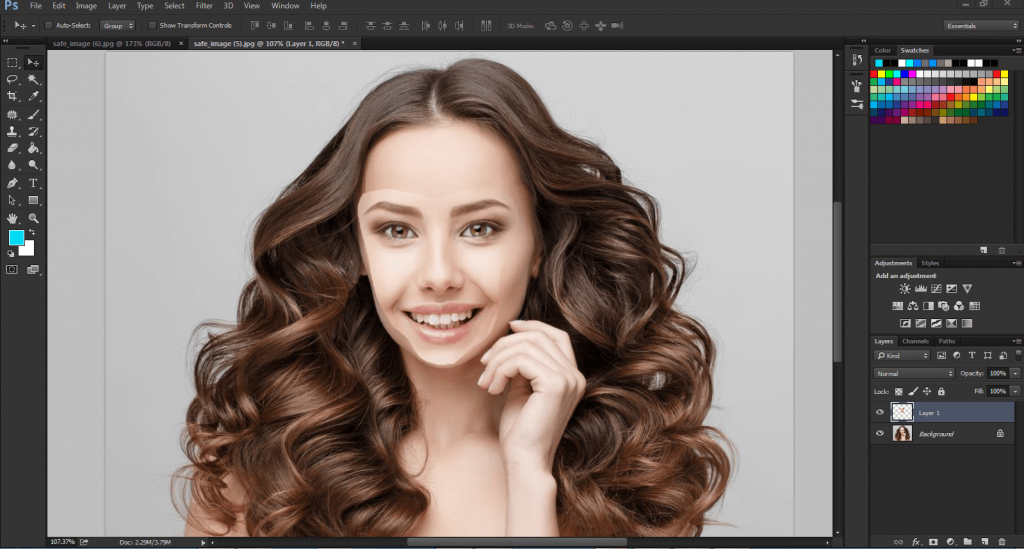
You can now notice that the selected face is not covering any hair or any features of the woman’s face. If your images have hair, don’t cover that with the selected face. So, you have to be careful enough when set the face.
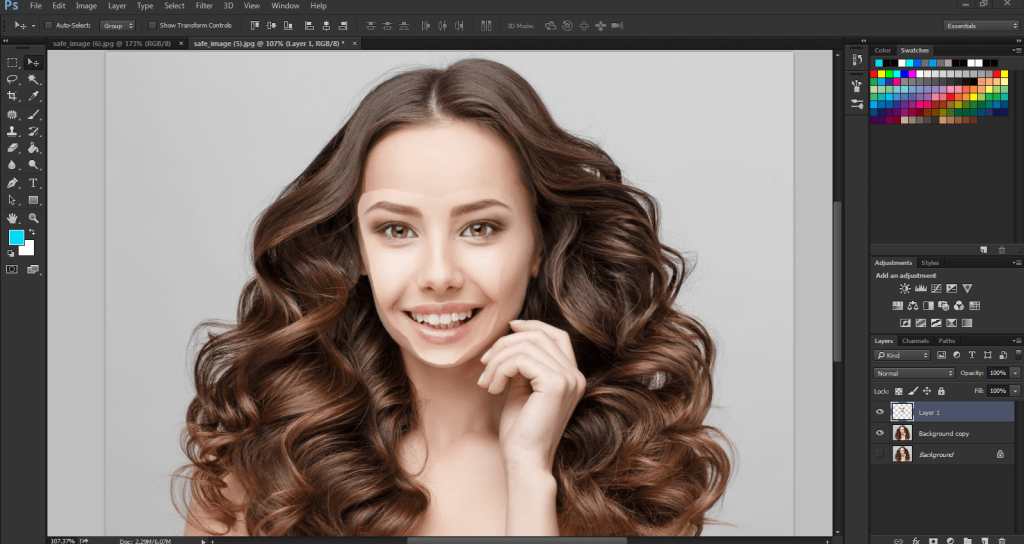
However we have done it perfectly. Now click on the background image and press Ctrl J to duplicate the layer. Then we will shut off the visibility of background layer.
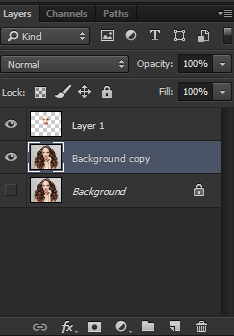
Now we will click on the layer thumbnail (Ctrl+click) to make a selection out of the selected face.
After doing that we will go to select>modify>contract and contract the selection by 5 pixels.
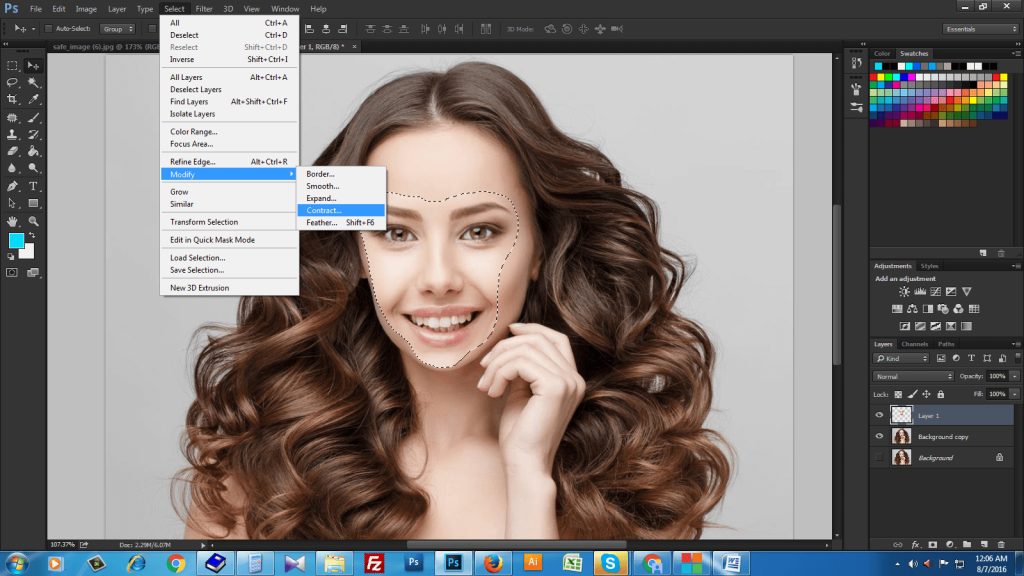
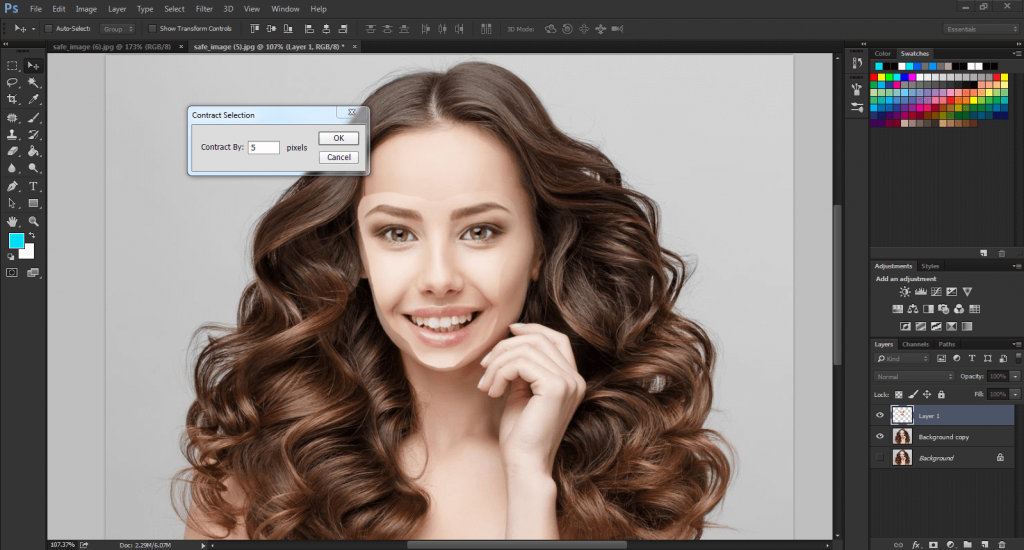
Now press OK and see the result. Press Altr and use the mouse wheel to zoom in. You will notice that the selection is no longer at the edge of the layer. It is contracted by 5 pixels and you wanted to do it.

Then we will shut off the visibility of the selected face layer. Now click on the woman face layer.

Then we will press Backspace to delete those pixels.
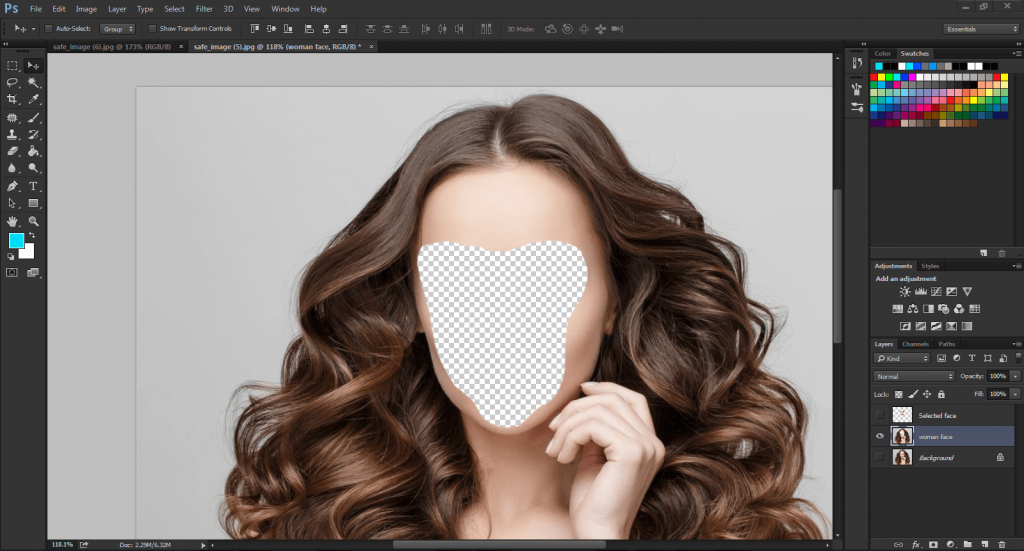
Again we will click on the layer of selected face and bring the face back.
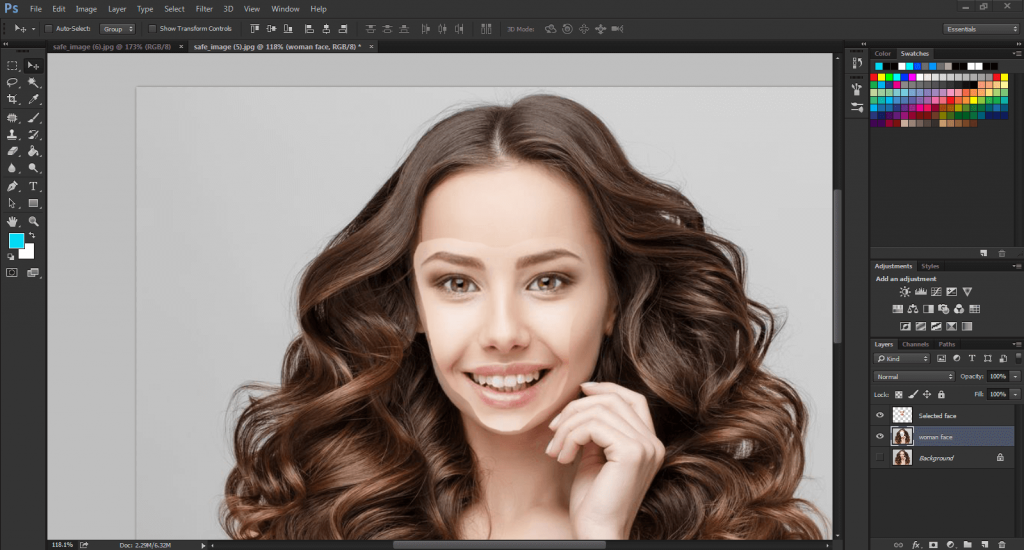
Now we will press Ctrl D to deselect.
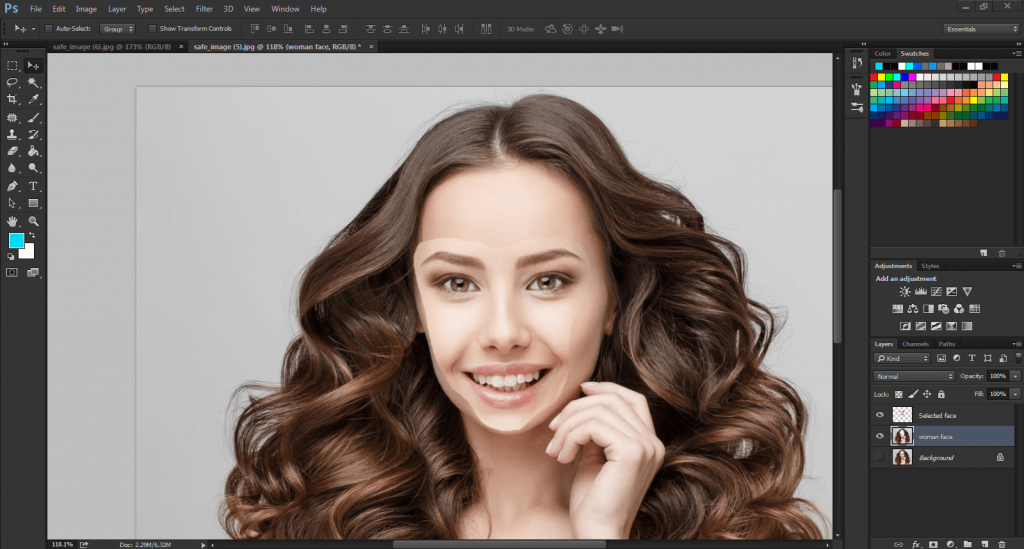
Then we will select both layers by holding shift key. Finally we will go to edit option and select Auto Blend Layers.
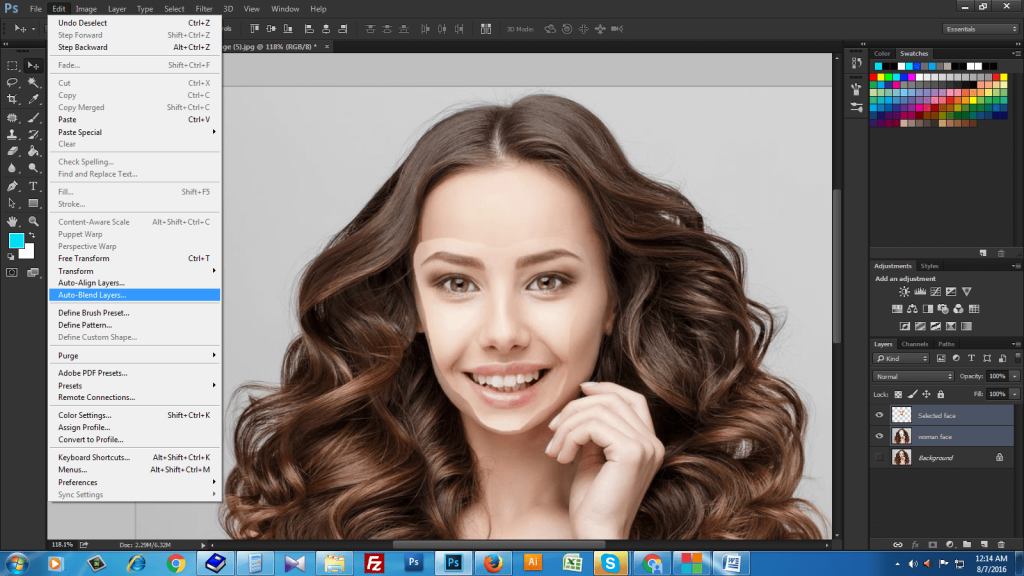
Here we have to sure that the Panorama is selected and the Seamless Tones and colors is checked. And then press OK.

Oh, now see the magic of Photoshop. It automatically blended two layers together and matched the tone automatically.
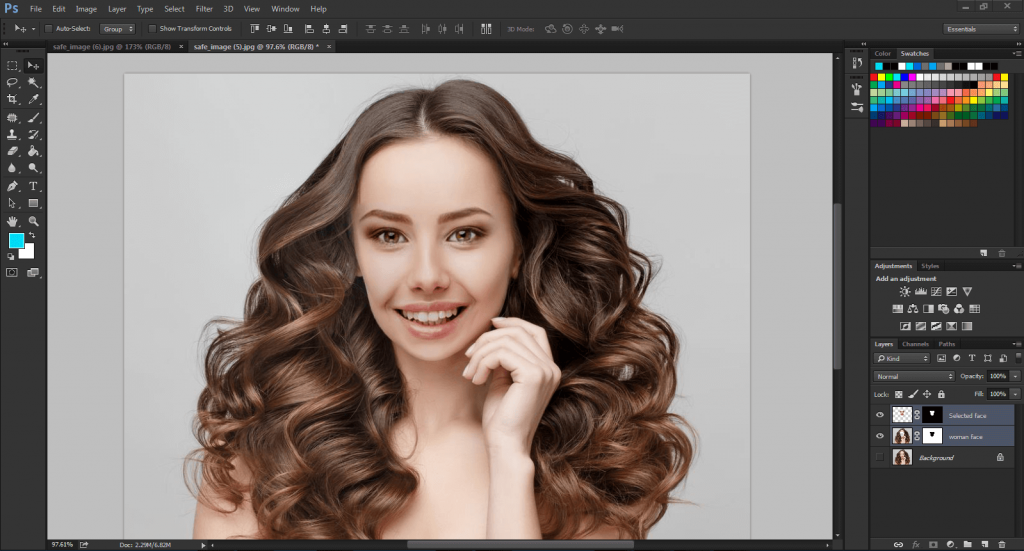
You can see they are still two separate two layers. But Photoshop has adjusted the colors automatically and created two layer masks. And those layer masks allowed these two images/faces to blend together perfectly.
Then we will press Ctrl G on keyboard to make those layers into a group.
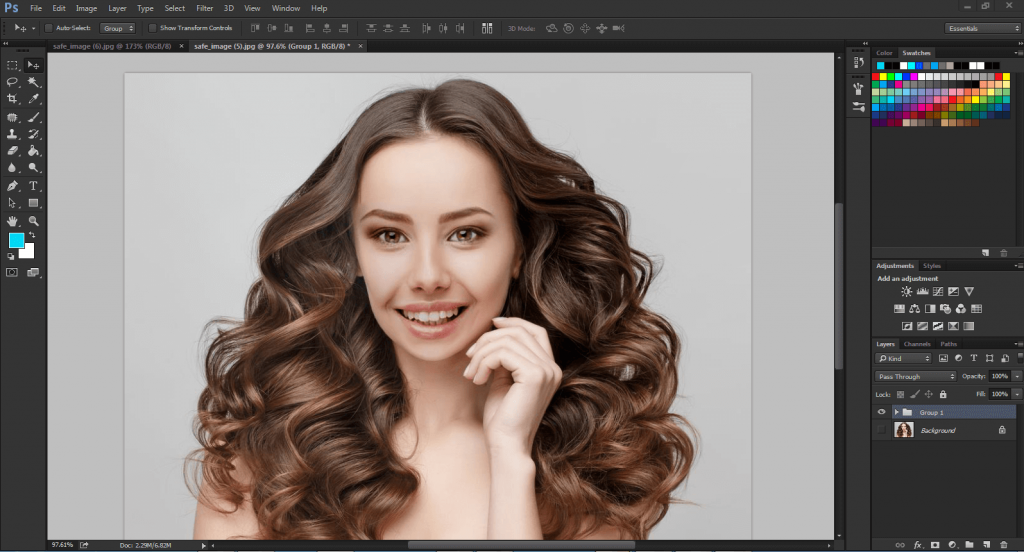
Now we will turn on the visibility of the background layer. And if you click on the visibility of group layer, you can see the before and after effect of your images. This is the magic of photo manipulation service.
So, here Photoshop did a great job indeed. And of course Photoshop is so good to do this to match the skin tone of two faces. You don’t have to use the face of a similar skin tone. In this way you can match the skin tone of dark person with a light person. Photoshop matches that automatically.
If you want to get more idea, Please contact us. We will help you by providing more easy Photoshop tutorial on different services.


