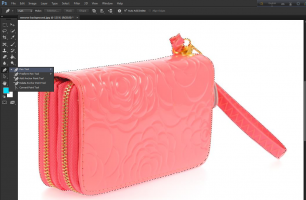
Do you know using pen tool is so easy? Believe it.
Today we will show you the perfect technique of using Photoshop pen tool for clipping path service to remove background.
Before we go through this tutorial part on how to use pen tool, we need to know the very basic of doing clipping path.
Clipping path is nothing but closed vector shape or path which is used to trim out a 2D image in any image editing software. Anything done in the clipping path service will be kept by the software and outside of the clipping path will be cut out by the software.
By this definition, you will now have a clear view of what we will go through. As mentioned before, clipping path can be done in many software. To be precise, it can be done in any image editing software. You do not need to have a high-end pc and costly photo editing software to do so.
But as we know that Photoshop is very popular (and expensive as well), so we are going to do our tutorial in Photoshop. Many clipping path service companies are using Photoshop pen tool to remove background.
Let’s get started using pen tool
Step 1: Obviously you need to start the app to do the background removal work. Double click on your app and wait for it to start. It might take pretty much time depending on your PC’s configuration.
Step 2: After opening your screen should look like this.
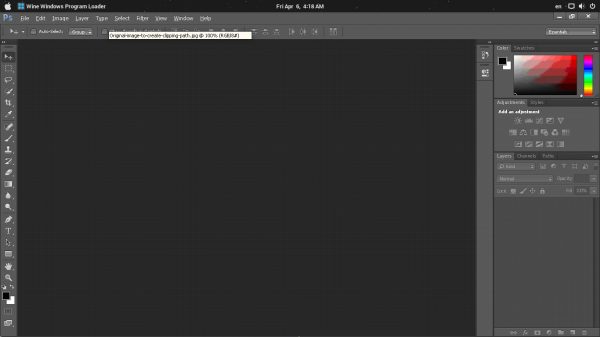
Don’t worry about other things. Just focus on the pen tool which looks like this
![]()
. Or you can use the shortcut by pressing the keyboard button “P”(it is the easiest way for me and saves my time).
Step 3: Open the desired image by clicking File>Open. You must select the image supported files only. You don’t want to edit your music files with, do you?
Step 4: After clicking the image file your window will look like that.
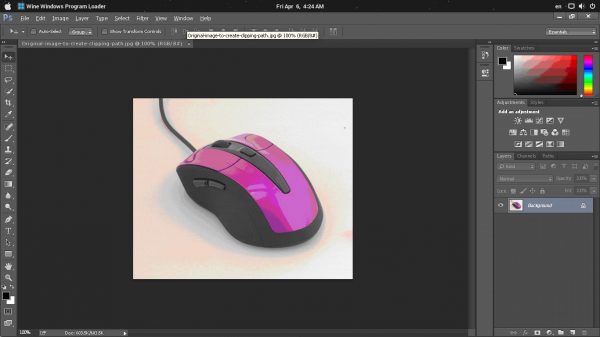
Don’t worry if your selected image is not same as mine. Our choices are not same. But you need to focus on the right panel which is named “Background.”

If you apply clipping path on this locked background, the background will not remove. But if you unlock it, the background remove will do work. To unlock this, just click on the lock, and you are good to go. And all clipping path service providers do the same.
Note: Sometimes it tells you to layer the name, so name it layer 0, photo cut out or anything you want.

Step 4: You’ve already chosen the pen tool, so do not need to repeat it again. If you missed it then do the step one.
After that start from anywhere of your picture. To start just click on it. You can zoom in or out for a better photo cut out. To zoom in use ctlr+ and for zoom out use ctrl- and to fit the screen use ctrl 0. After clicking on one point you will see a square on your image. This is the starting point of your pen tool.
To continue you need to click on the other point. I mean you need to carry on your clipping path service by clicking like in the given image.

The image may pixelate on the base of your image quality. You have to click and click until you’ve wrapped the object with pen tool’s line.
It’s a little bit tricky on curvy side of the images. You have to drag your mouse little bit further to cover curvy edges of the object you have chosen. Don’t drag too far or drag too close.
If you measure the half of the curvy images by your naked eye (you don’t need to be exact), then you can apply the curvy lines of the pen tool.
Believe me; this worked almost every time for me. Play with your pen tool for a while then you will know the right usage of the tool. Sometimes you may point to the wrong direction. If so, use the mighty ctrl z. It will redo and undo your work. If you want to multiple, undo then just do ctrl+alt+z multiple times until you are satisfied.
When you almost wrap up your desired object, you have the last thing to do with your precious pen tool, which is closing. If you keep your mouse close to the end, then you will see the pen tool has round shape which indicates that it will close.
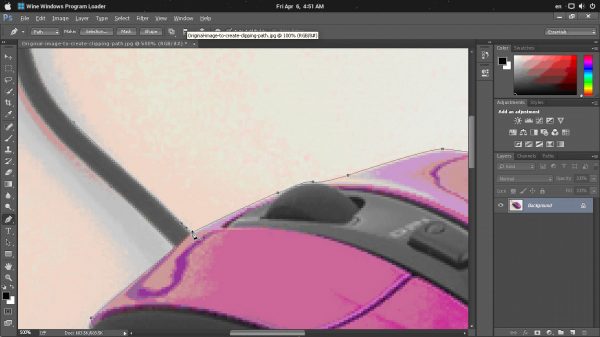
So close it.
Step 5: Last but not least, after closing it you will see a line on the object (for me it is a mouse).
So selecting those lines, you need to press alt+enter at a time. By pressing this, you will select your mouse successfully. But you have to inverse your selection. Because if you don’t then your object will be gone.
To inverse, you can do it by Select>Inverse, or you can use the shortcut by pressing clrt+shift+I (I prefer using shortcut because it is way easy). After doing it, your image will somewhat look like mine.
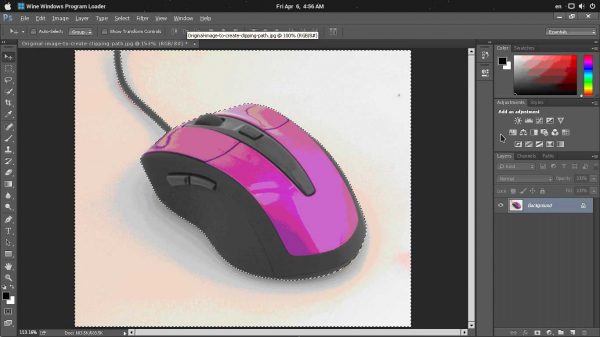
You’ve done everything, but the curious mind will want to know that where is background remove? The answer is a backspace. You just need to press backspace to remove the background. After removing your background, your image will look like that.
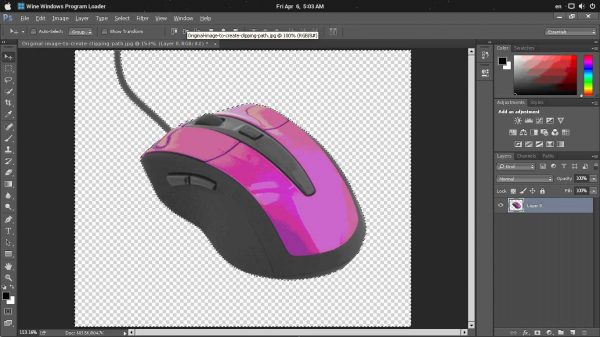
Now you might wonder that when will the border will go.
To do that you have to deselect the selection by going Select>Deselect. In my case, I will use the only ctlr+D, and it is way easy for me. Now you have a transparent background of your background remove the object.
You can save it by going File>Save As then selecting your favorite file format. You have completed the clipping path service on your own successfully.
Conclusion
You might wonder why many clipping path service providers using clipping path technique over magic wand tool. If you use that you can see the square edges of the clipped image which is bad. But if you use the pen tool to clip path, then you will not see the square edges.
And another benefit of using clipping path is that it is almost accurate. You will not see any fail in using the pen tool. Because of the demand and difficulty of the work, there are lots of companies which are dedicated only for clipping path service.


